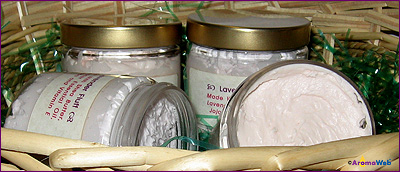
Whipped Shea Butter Recipe
Introduction
Whipped Shea Butter is a decadent treat for your skin. It is light, soft and creamy and contains all the nourishing properties of the Shea Butter and the essential oils that you add to it. The consistency of Whipped Shea Butter is somewhat similar to that of whipped cream. It is a bit tricky and time consuming to make, but the results are well worth it.
This recipe will make approximately four 4 ounce jars of whipped shea butter.
Whipped Shea Butter
Ingredients
- 8 net wt. ounces Shea Butter
- 1 Tbs. Jojoba
- 1/2 tsp. Vitamin E Oil (preferably T-50 or T-80)
- 1/4 tsp. Lavender Essential Oil
Directions
- Have a large mixing bowl ready that is capable of withstanding both hot and cold temperatures.
- Ensure that there is enough room in your freezer to accommodate the large mixing bowl.
- Using a double boiler, heat water to boiling in the lower portion of the double boiler.
- Reduce heat to medium.
- Add the shea butter to the top section of the double boiler and allow to melt. Stir regularly.
- Using a candy thermometer, adjust the temperature of your stove until the shea butter reaches 175 degrees F.
- Continue to heat the shea butter at 175 degrees F for 20 minutes. Try not to heat the butter much higher than 175 degrees F as that may damage some of its nutritive constituents.
(Heating to this temperature for this duration prevents the shea butter from turning gritty. Shea butter has a tendency to form a gritty texture if it is melted to quickly.) - Shea butter is flammable. Keep an eye on it as it is being heated.
- After the shea butter has been heated, quickly transfer it to the large mixing bowl.
- Quickly add the jojoba and Vitamin E oils. Do not add the essential oil yet.
- Begin mixing the shea butter using a mixer. If you have a whisk attachment for your mixer, use that instead of the beater heads. A stick blender may be used, but I've found the results to not be as ideal.
- Continue mixing the shea butter for approximately 5-7 minutes.
- The shea butter will still be in a highly liquid form at this stage. Transfer the mixing bowl to the freezer for approximately 5-10 minutes.
- Remove from the freezer. The shea butter will still be in a liquid stage with the exception that a film of solid shea butter probably will have formed.
- Begin mixing the shea butter again for 5-10 minutes.
- Repeat the mixing to freezer process several times.
- Gradually, you will notice your shea butter firming up and becoming the consistency of whipped cream or frosting.
- It takes practice to get the timing right. Quickly chilling the shea butter for short intervals is important to help expedite, enhance and maintain the fluffy texture of your whipped shea butter. It's also important because using a mixer creates friction and heat, and can actually keep the shea butter from cooling if you keep mixing it for too long. Think of a Vitamix blender and its ability to turn water and veggies into hot soup in minutes due to the friction. Also, if shea butter doesn't cool quickly, it can become gritty. It's also important not to overchill (freeze) your whipped shea butter.
- Once the whipped shea butter has the consistency of whipped cream, add the lavender essential oil. Always sure to follow all safety precautions and always research the safety info and contraindications for every essential oil that you consider working with.
- Mix again for several minutes to ensure the essential oil is evenly distributed.
Packaging
Spoon your Whipped Shea Butter into 4 ounce containers and label them. Include the date that you made the butter on your label.
Shelf Life
The Vitamin E Oil contained in this recipe offers anti-oxidant properties. However, this sugar scrub does not contain preservatives.
For maximum freshness, use the Whipped Shea Butter up within a month and discard any that hasn't been used within that time. With how luxurious Whipped Shea Butter feels and with how good it is on the skin, you'll probably use it up before a month is over with anyhow.
Because you will be exposing your Whipped Shea Butter to bacteria and other contaminants each time you reach into the container to take out product, this Whipped Shea Butter will have a much shorter shelf life than similar commercial products that have preservatives added.
To keep your Whipped Shea Butter fresh for as long as possible, store it in a cool location and try to ensure that your hands are clean when you use it.
General Safety Information
These recipes are offered for educational purposes only. Before using any essential oil, carefully read AromaWeb's Essential Oil Safety Information page. For in-depth information on oil safety issues, read Essential Oil Safety by Robert Tisserand and Rodney Young. Do not take any oils internally and do not apply undiluted essential oils, absolutes, CO2s or other concentrated essences onto the skin without advanced essential oil knowledge or consultation from a qualified aromatherapy practitioner. For general dilution information, read AromaWeb's Guide to Diluting Essential Oils. If you are pregnant, epileptic, have liver damage, have cancer, or have any other medical problem, use oils only under the proper guidance of a qualified aromatherapy practitioner. Use extreme caution when using oils with children and consult a qualified aromatherapy practitioner before using oils with children, the elderly, if you have medical issues or are taking medications.
Do You Need the Ingredients Listed in This Recipe?
You can find the essential oils, other ingredients and packaging that you need by patronizing the fine companies that support AromaWeb with their banner advertising located throughout AromaWeb (See them all at a glance within the Advertiser Spotlight area) and the listings located within the Aromatherapy Business Directory. Many of AromaWeb's advertisers also expertly formulate their own ready-made products if you decide you'd rather not make aromatherapy products yourself.
Do You Want More Essential Oil Recipes and Blends?
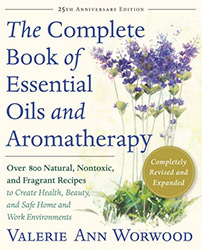
Over 800 Recipes!
The Complete Book Of Essential Oils & Aromatherapy
Author: Valerie Ann Worwood
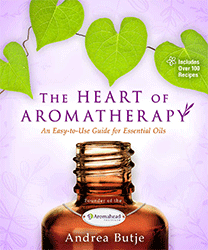
Over 100 Recipes!
The Heart of Aromatherapy
Author: Andrea Butje
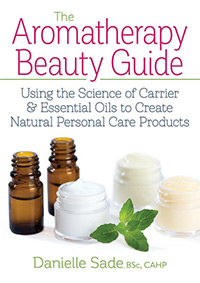
100 Recipes!
The Aromatherapy Beauty Guide
Using the Science of Carrier & Essential Oils to Create Natural Personal Care Products
Author: Danielle Sade, BSc, CAHP
Visit AromaWeb's Books area to find details about many other essential oil and aromatherapy books.